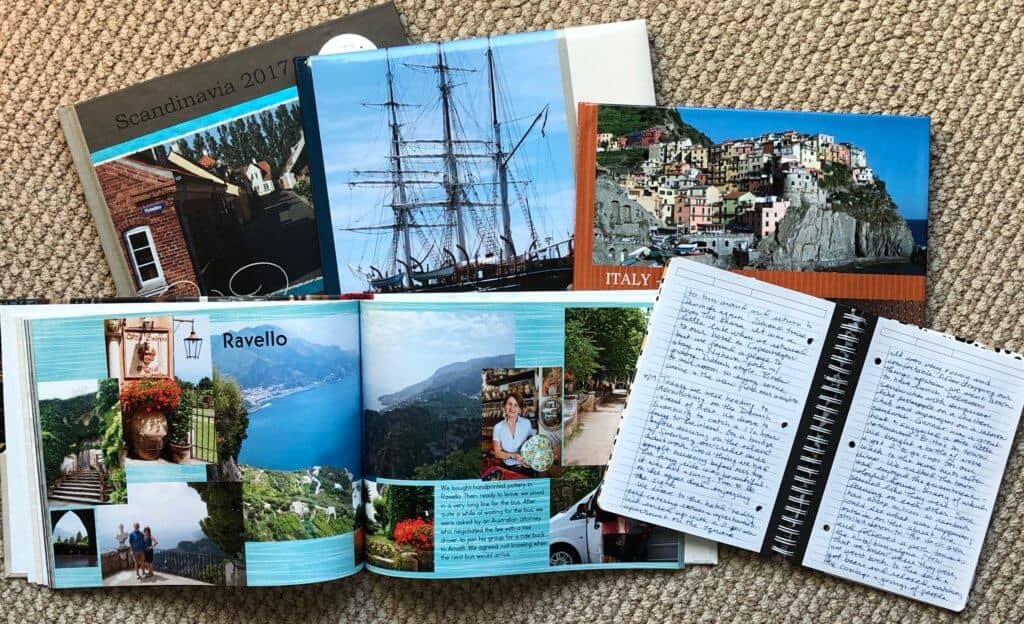
After a trip, it takes time to unwind, regroup, and reconnect with friends, responsibilities, and routines. But don’t let too much time go by before documenting your travel! Photo books are a great way to capture your memories, so our experiences can be relived for many years to come. I’ve been making photo books for years for family members (and me!). Actually, the photo books have become my favorite souvenirs of fun times away from home.
Write in a Travel Journal While Away
Journaling every day of the trip means you capture the little interesting, funny, or quirky things that happen on the trip. For us, we prefer an old-fashioned bound journal. It’s small and is usually tucked in our carry-on for easy access. It all begins when Pop or I write on our flight over, and we write every day of our trip. What’s great is that it captures the emotions (excitement at exploring a new place, frustration when the “automatic” transmission car wasn’t automatic, or when you get lost while driving the countryside) along with the new things we learned. Our journal has been on many trips over the years. Perhaps it’s time to begin using a shared app on our devices. That would sure free up a little space in our luggage!
Why Make a Photo Book?
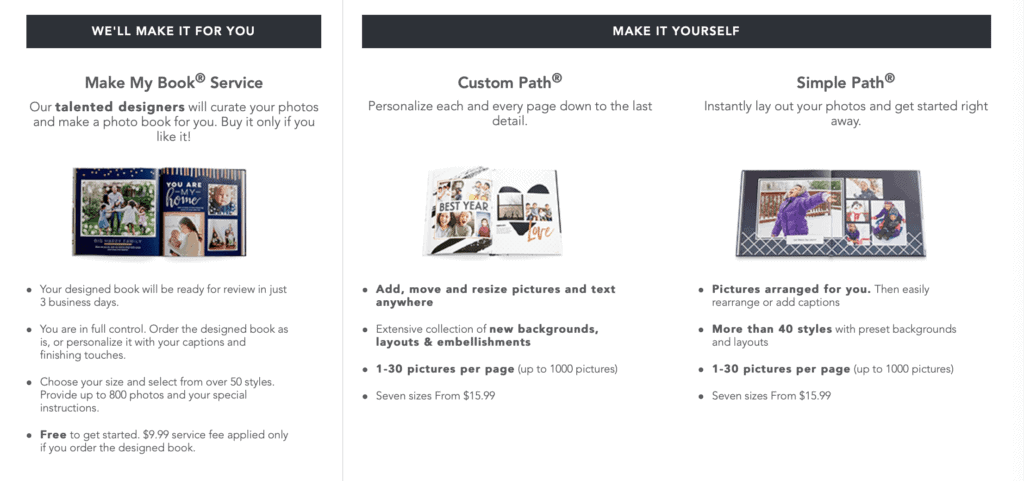
One way that we’ve found to tell the story of our travels is to make photo books with our favorite photographs and captions. Creating a photo book can be time-consuming (especially for someone who is a little detail-oriented like me). However, many online companies make it so simple with easy-to-use templates that you just drop a picture in a frame on the page.
Check out providers online to find a company with the end product and online support that suits you. I started using Shutterfly years ago and have stuck with them because I like their photo books and the process of creating a photo book offers many options. A bonus of using one company is that your pictures (and the books you created) are online and easy to access years later. Alternatively, you can find a camera store that might provide personal support as you navigate creating a photo book there.
I like my photo books to tell a story, so I plan the pictures in chronological order which could begin with driving to the airport. The book continues with things we see and ends with us flying back or arriving back at an airport. Once we included a picture of the person coming to pick us up or our car waiting for us in the airport parking lot as our final picture.
In addition to adding pictures and captions to tell what the pictures are about, I like to include the history of places we visited. Also, I include interesting experiences — good or bad — along the way. For example, we did get lost and circled a roundabout multiple times in Dublin until we figured out the correct path to our destination. 🙂
How to Make a Photo Book
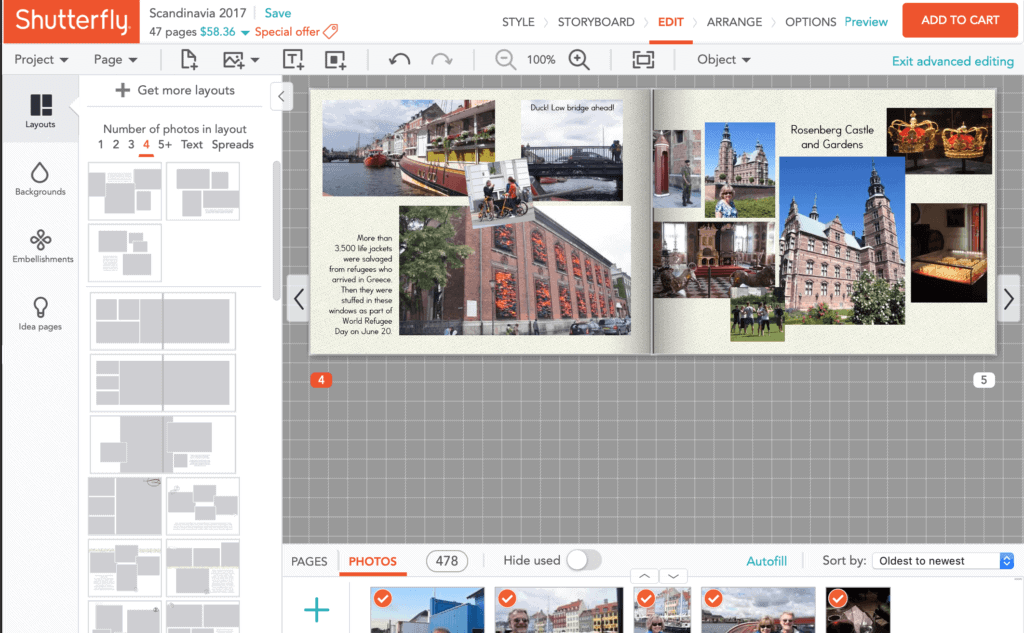
The websites have made it easier and easier to import and manipulate images and add text boxes. Many offer idea pages along with a variety of page layout options for 1, 2, 3, 4, and 5+ pictures per page. Also, embellishments (stickers, ribbons, picture frames) add visual interest.
Choose a Book Size
Once you decide on the size of the book, you can choose to have a photo book created by the software or choose to customize the book. Typical book sizes are 8×8”, 8×11”, 10 x10”, or 11x 14.”. As far as book size, I opt for the 8×11 size because it fits so neatly on the bookcase. Once I started with that size, I continued because I like the uniformity of size. Plus it’s easy to view the destinations and years of trips along the spines.
Choose a Path to Create the Book: Let the Software Do It For You OR Do It Yourself!
I’ve created books in several ways, but I like the Custom Path best because I can place the pictures where I want them. For example, if I’ve got 5 really good pictures of a visit to a castle, I may want them all on a two-page spread. If I let the software choose picture placement, some of those castle pictures may end up on another page with a visit to a vineyard.
So I choose the best photographs of places we visit along with some that remind us of special moments. One such moment was when Pop parked our rental car in a tiny garage off a narrow cobblestone road in Florence. In addition, I add a bit of text to describe where we were, why we visited a certain spot and funny or interesting things that happened to us along the way.
Photo Book Tips
However, if you choose to remember your trip, don’t let too much time go by before tackling a project like a photo book. (I didn’t act right away on creating a photo book on a trip a few years ago, and then realized many months later that I really couldn’t remember the details about some of the pictures I took.)
Give a Photo Book as a Gift
I create photo books after a trip and present the finished books as holiday gifts. For this, I get multiple copies so each of my children’s families has their own copies. It’s fun to look through the books together. Before long, there are chuckles when someone turns a page to find a funny forgotten memory.
For books about family trips, I usually reserve a page that includes:
- sayings that develop during the trip
- quirky things that happen
- references to pop culture or the news at the time
Create a Wall of Vacation Pictures
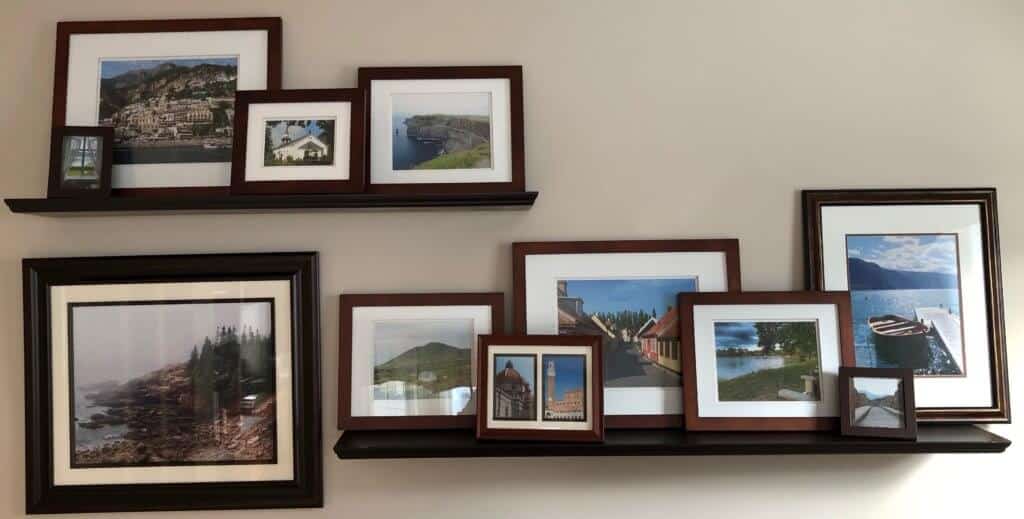
One thing Pop and I did in the past few years is create a collection of photographs from favorite places. We chose beautiful sights and included pictures of things that matter only to us. One such picture shows the small church in a Swedish town from which Pop’s ancestors emigrated in the 1800s.
We chose pictures and frames of different sizes and displayed them on floating shelves on one wall in our den. You can make your display look traditional to modern depending on the frame and shelf style and color you choose. Some prefer canvas prints or simply black & white photos, but we chose color photographs and brown frames. Another idea is to have your pictures displayed going upstairs.
Final Thoughts
Traveling opens so many windows to new cultures and people. You’ll be thankful in years to come if you spend a little time after a trip to capture the highlights you experience — with pictures and text (so you remember why you took the pictures in the first place!). A little investment in time now will yield happy memories in years to come when you want to relive a little of your past travels.
Comments?
Feel free to share your suggestions about and experiences with creating photo books or other ideas to capture favorite travel memories. Your thoughts could help other travelers. Thanks! 🙂